Templates
A template is the blueprint for a document. It tells the AI where to find key information, what to do with it, and where each value lands on the page. Every document you run it on fills in the same way, because the template spells out exactly what to do.
Sources are the documents that make up the template. Fields are the values the template captures or prints. Each field knows its value origin and its page destination.
Create a template
Open Templates and click New template.
The New template dialog opens. You pick a starting point from the menu options.
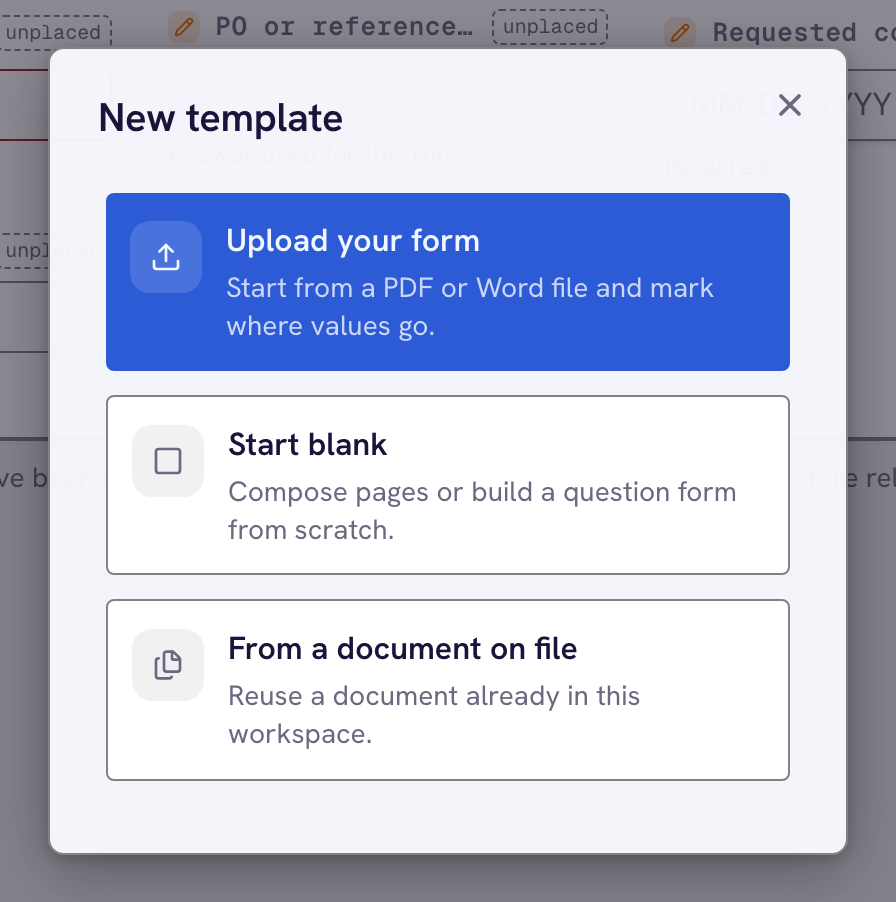
Upload document accepts a PDF or Word file. For a PDF you can also add one or more filled copies, and the app uses them to pick or place the fields. Start from scratch begins with an empty template and no file: the preview offers a blank page, an upload, or a form, and you add a blank page or a document any time from + Add in the document bar. From a document on file starts from a document you already uploaded.
The template is created the moment you pick a starting point. It appears in the sidebar and opens in the template editor right away, before you name it or add anything to it, the same way a new workspace or mailbox exists as soon as you create it. The document preview appears on the main canvas. Uploaded Word files hide the standard field-type toolbar. They place fields as paragraph anchors instead of drawn boxes.
Name the template by clicking the name in the toolbar. A new template starts as Untitled Template (numbered if that name is taken). Template names must remain unique across your active workspace. The app blocks the save with an already exists message on a collision. Edits after creation stay local until you click Save.
Add a source
The document bar above the canvas lists the template's sources. Data always sits on the far left, and you cannot remove it. You fill form fields and run the template from there.
Click Add to bring in another source document. You pick Upload new file, Blank page, or Sources from this workspace. Each document joins the bar next to Data.
When a template has multiple sources, they stitch in order into one PDF. You drag a source in the bar to reorder the output.
Removing a standard document asks for a confirmation click. A blank page removes immediately without a confirmation prompt. Combining & reflowing documents covers assembling several sources into one output.
Add a field
A field is one value the template produces. Its Inputs section says where the value comes from. Its Outputs section says what stamps on the document. A Write zone is the exact spot on the page.
Pick a field type from the editor toolbar. The types include Text, Number, Date, Select, Signature, Checkbox, and Image. The plus menu holds Address, Options, and Batch.
The field drops with a static input reading SAMPLE VALUE and a write zone. Every field stores its value under a stable key. Renaming the display label never moves the underlying data.
Pick an option under Value source to assign where the value comes from. Form field is typed by a person, in the Form card on the Data tab, on a case, or in the portal. Extracted makes the AI read it off the document. Static uses the exact same text on every run.
From case reuses a value another document saved to the case. From the delivery reads the email or Drive folder that carried the file. New fields default to a form field if no document is attached yet. The source picker stays hidden until you attach a file.
Fields & value sources covers every type and source. This includes the identifier field that routes files to the right case.
Place it and save
You drag a write zone to position it correctly. You resize the zone by pulling from the corners. The template value stamps at those exact page coordinates.
Click Save in the toolbar to save changes. You undo and redo changes using Cmd+Z and Cmd+Shift+Z in the editor toolbar. Templates act as live configuration: edit a field, save, and the next run uses the new logic.
Template details in the toolbar holds the template-wide settings. These include AI instructions, Document reflows, Output category, Output file name, and the Drive folder.
The app drafts the fields for you if your PDF already has fillable form fields. It also drafts fields if you have a copy someone filled out. See Build from a completed example to learn more.
Run it
The Run button sits in the toolbar on every tab. The Data tab is always present and holds the form fields a run needs. A template without a document defaults to this tab. On the Data tab, Run uses the answers typed into the Form card and shows what it captured in the Values card above it. On a document tab, Run opens the Test & Preview dialog to collect them.
A template with form fields and no document is a form. Your team fills it from a case under Fill a form in the Documents list, and clients fill it in the portal. Running it in the editor shows the values it would save.
Every run saves every value to a case. Run autofill covers per-run instructions, re-running, and how extracted values and edits merge.
Follow the tutorial to see a template built and run end to end.